Sections
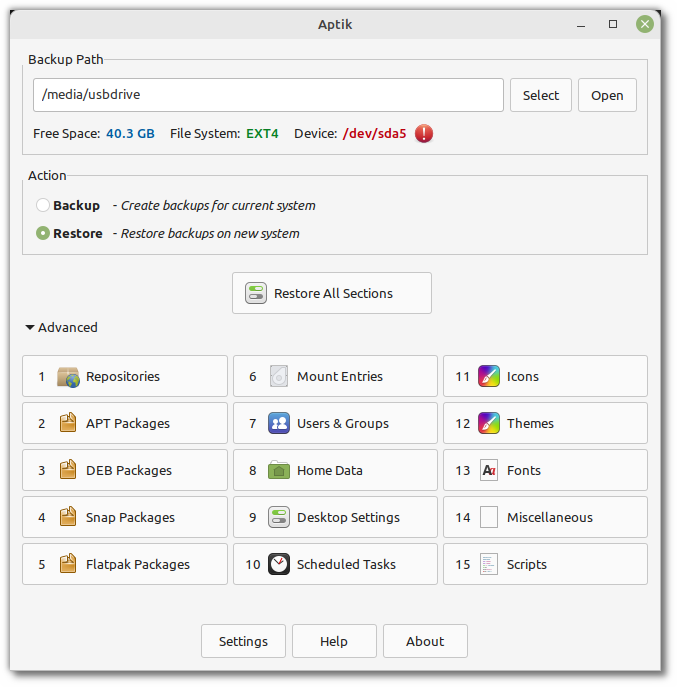
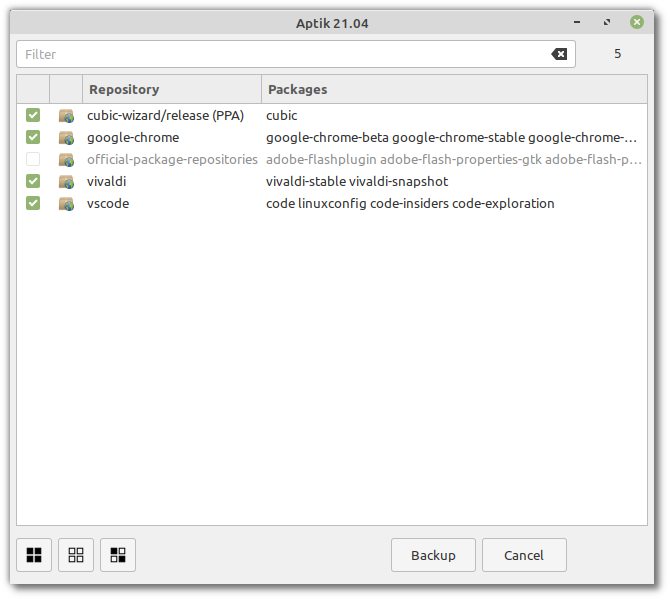
APT Repositories
This section takes a backup of Debian (APT) repositories. All APT repositories including Launchpad PPAs and third-party repositories are supported.
Backup
Command-line syntax:
aptik --backup-repos
Following actions are executed for backup:
Official repositories for the Linux distribution are ignored
Launchpad PPAs are saved in file
<basepath>/repos/files/launchpad-ppas.list.Non-official APT repositories are saved to the backup path.
APT keys are exported to file
<basepath>/repos/files/apt.keysPublic key files (if any) are saved to the backup path.
DEB822
Newer Debian repositories created in the DEB822 format are also supported.
Restore
Command-line syntax:
aptik --restore-repos
Following actions are executed for restore:
Official repositories for the Linux distribution are ignored
Launchpad PPAs are added using command
add-apt-repository. The PPA must have packages for the system codename (focalfor example). The repository will not be added if it doesn’t have packages for your system.Third-party APT repositories are installed by creating the source file in
/etc/apt/sources.list.dand installing the public key. If the source line contains a system codename (liketrusty,xenial, etc), and the codename does not match the target system (focalfor example), then Aptik will check whether a repository exists for the target system (focal). The new repository will be added if it exists, otherwise the older repo is added.APT keys are imported from file
<basepath>/repos/files/apt.keysPublic key files (if any) are installed
Package information is updated by running
apt update
Disabled Repositories
APT Repositories
are disabled automatically by the system when there no
installed packages left. Disabled repositories will have (disabled)
in the description when displayed by Aptik.
Launchpad PPAs
A Personal Package Archive or PPA is an APT repository hosted on
Launchpad.net servers. This term is used exclusively for repositories
hosted on Launchpad.net servers. Launchpad PPAs will have (PPA)
in the description when displayed by Aptik.
All PPAs are APT repositories but all APT repositories are not PPAs.
Software Packages - APT
This section takes a backup of the list of extra packages that were installed by users. During restore the packages are downloaded and installed from repositories.
Note
Only the list of packages are saved to backup location. The actual packages (*.deb) and the files installed by the packages are not saved.
If you have any software that was compiled from source, or installed from downloaded DEB files, those software will not be saved.

Backup
Command-line syntax:
aptik --backup-packages
Following actions are executed for backup:
List of installed packages are saved to
<basepath>/packages/files/installed.list. This file is saved only for reference and is not used during restore.List of installed packages are filtered to remove the following:
Kernel packages -
linux-headers*,linux-signed*,linux-tools*,linux-image*Library packages -
lib*- These are dependencies for other software and will be installed automatically if needed.Non-native (foreign) packages. For example,
i386packages on anamd64system. Can be included in list with option--include-foreignbut not recommended to include. These are usually dependency packages and will be auto-installed if needed.Theme packages -
*-themeare excluded if option--exclude-themesis specified. You can use this option if you restore themes using command--restore-themes, and do not wish to receive updates for the packages.Icon theme packages -
*-icon-themeare excluded if option--exclude-iconsis specified. You can use this option if you restore icon themes using command--restore-icons, and do not wish to receive updates for the packages.Font packages -
fonts-*are excluded if option--exclude-fontsis specified. You can use this option if you restore fonts using command--restore-fonts, and do not wish to receive updates for the packages.Packages that were auto-installed as dependencies for other packages. These are excluded since they will be auto-installed if needed.
Packages that are part of the Linux distribution base. This is determined by reading the log file that was created by Ubuntu’s Ubiquity installer after installation (
/var/log/installer/initial-status.gz). This file will not be present on Linux distributions that were installed using other installers. On such systems the base packages are determined using pre-defined lists.
List of filtered packages are saved to
<basepath>/packages/files/selected.list.Deb files in the package manager cache are copied to the backup location. These files will be copied back into the cache on the new system. This saves time and bandwidth during restore, since some of the required packages will be available in the cache, and won’t have to be downloaded again.
Restore
Command-line syntax:
aptik --restore-packages
Following actions are executed for restore:
Packages that are not installed, but available in repositories, will be installed using the package manager.
aptitude,apt-getoraptwill be used in order of preference.Newly-downloaded packages are copied to the location
<basepath>/cache/files/for future use. This is useful if we use the same backups to restore to another machine. The next restore will take less time to complete since all required packages will be available in the cache, and won’t have to be downloaded again.Package manager cache is cleaned after restoring packages. This removes downloaded packages which are no longer required, and frees up disk space on the system.
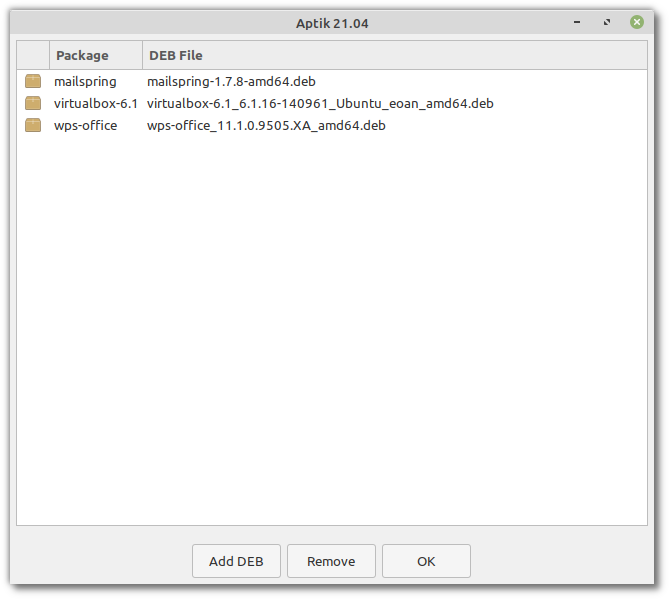
Software Packages - DEB
This section is useful for installing packages from Deb files. Here we can add Deb packages that were downloaded from the internet. All Deb files found in the backup path will be installed during restore.
Backup
Deb packages can be copied manually to <basepath>/debs/files/.
Use the Add DEB button in the GUI to copy files to this location.
Restore
Command-line syntax:
aptik --restore-debs
Packages found in the backup location
<basepath>/debs/files/will be installed one-by-one usingapt.Dependencies for Deb files will be resolved automatically if they are available in installed repositories.
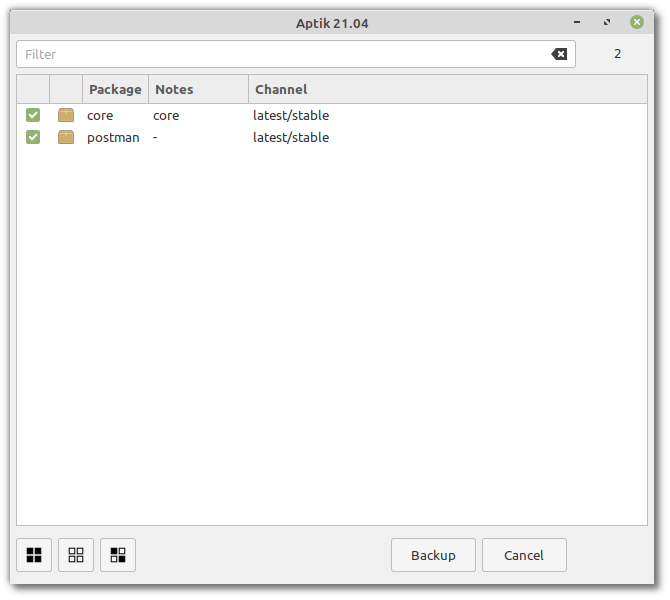
Software Packages - Snap
This section takes a backup of Snap packages. Packages will be downloaded and installed on restore.
Backup
Command-line syntax:
aptik --backup-snaps
Following actions are executed for backup:
List of installed Snap packages are saved to
<basepath>/snaps/files/packages.list.
Restore
Command-line syntax:
aptik --restore-snaps
Following actions are executed for restore:
Snap package manager will be installed if needed
Snap packages that are not installed, but available in Snap repositories, will be installed using the Snap package manager.
Packages will be installed in Classic mode if the original package was installed in Classic mode.
Packages will be installed from the same channel (
dev,stable, etc) as the original package.
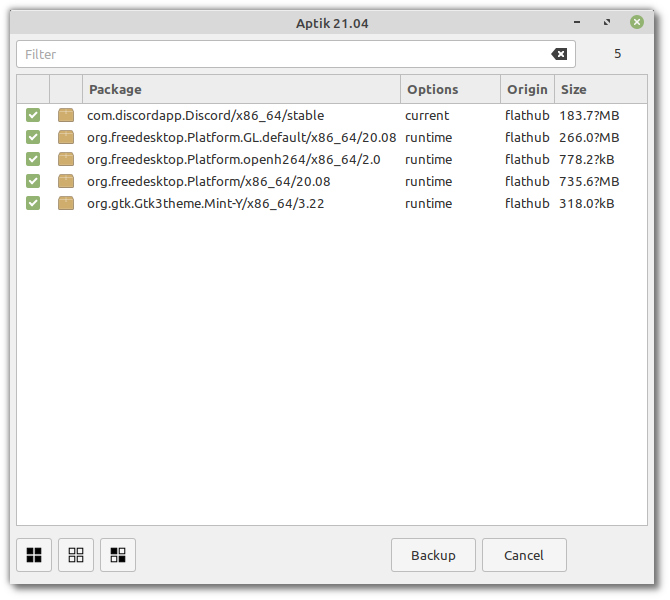
Software Packages - Flatpak
This section takes a backup of Flatpak packages. Packages will be downloaded and installed on restore.
Backup
Command-line syntax:
aptik --backup-flatpaks
Following actions are executed for backup:
List of installed Flatpak packages are saved to
<basepath>/flatpaks/files/packages.list.List of installed Flatpak remotes are saved to
<basepath>/flatpaks/files/remotes.list.
Restore
Command-line syntax:
aptik --restore-flatpaks
Following actions are executed for restore:
Flatpak package manager will be installed if needed.
Missing Flatpak remotes are added to the system
FlatHub remote will be added if missing.
Packages that are not installed, but available in Flatpak repositories, will be installed using the Flatpak package manager.
System & User Flatpaks
Flatpaks can be installed either for all users (using sudo) or for the current user only (without sudo). This section is only for Flatpaks that are installed for all users. Flatpaks that are installed for each user are located in the users’ home directory and will be saved/restored in the Home Data section.
Mount Entries
This section takes a backup of entries in /etc/fstab and /etc/crypttab.
This section is only for migrating mount entries for extra storage devices.
Mount entries for system devices ( /, /home, /boot, /boot/efi) and
for swap files and swap partitions will remain unchanged.

Backup
Command-line syntax:
aptik --backup-mounts
Following actions are executed for backup:
Files
/etc/fstaband/etc/crypttabare saved to backup folder<basepath>/mounts/files.
Note
Device names like /dev/sda1 and /dev/mapper/sda2_crypt will be
replaced by UUIDs like UUID=576be21b-3c3a-4287-b971-40b8e8b39823
while saving backup files. This makes the entries portable so that
they can be used on other systems where the device names may be
different.
Restore
Command-line syntax:
aptik --restore-mounts
Following actions are executed for restore:
Backups are created for
/etc/fstaband/etc/crypttabby moving existing files to/etc/fstab.bkup.<timestamp>and/etc/crypttab.bkup.<timestamp>New mount entries are added to
/etc/fstaband/etc/crypttab.System mount entries for
/, /home, /boot, /boot/efi, swap files and swap partitions will remain unchangedAll entries are sorted on mount point field before fstab file is written to disk. This ensures that base directories are populated before mounting sub-directories.
New entries added to
/etc/crypttabwill havenofailappended to the mount options if not already present. This allows the system to continue booting even if the device is missing during system startup.You can review changes before rebooting the system. Run
sudo aptik --list-mountsto view the updated entries after doing the restore. In case of any issues, replace the backup file from/etcfolder.# restore saved copy sudo mv -vf /etc/fstab.* /etc/fstab sudo mv -vf /etc/crypttab.* /etc/crypttab
If you are restoring using the GUI, then the entries displayed in the list is exactly what will be written to the system files when you click Restore button. Items displayed in green are existing entries and items in grey are new entries. Un-check any new entries that you don’t want to add to the system.

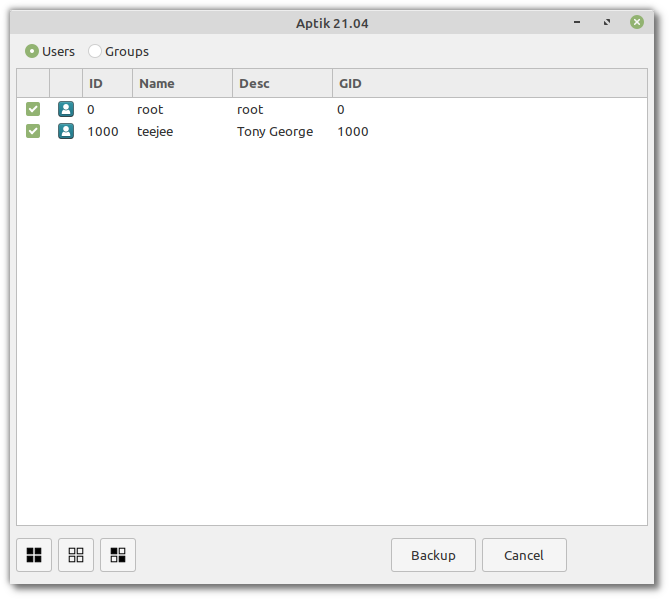
Users & Groups
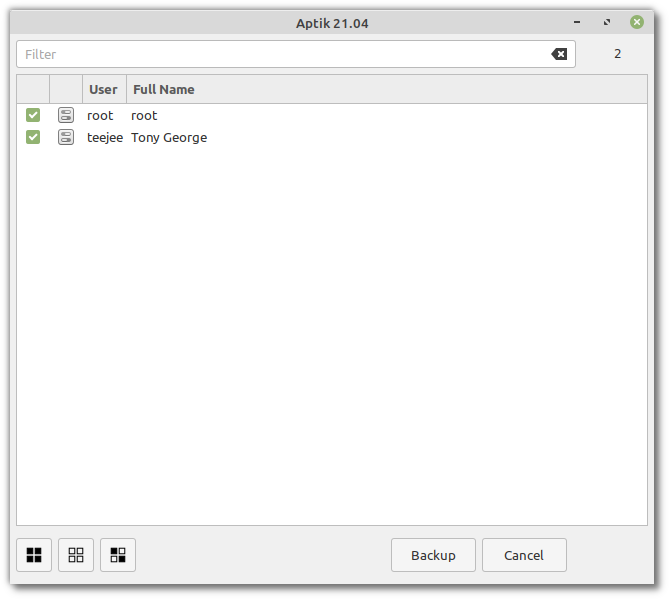
This section takes a backup of users and groups. User account settings such as login credentials and password expiry rules will be saved/restored.
Backup
Command-line syntax:
aptik --backup-users
Following actions are executed for backup:
Files
/etc/passwdand/etc/shadoware saved to backup folder<basepath>/users/files
Restore
Command-line syntax:
aptik --restore-users
Following actions are executed for restore:
New users and groups will be created to match the previous system
For all users, the user’s full name, home directory, and other fields are updated in
/etc/passwdand/etc/shadowUID and GID for regular users and groups will be updated to match the previous system.
UID and GID for system users and groups will remain unchanged
Any regular users or groups that were not present on previous system will be removed
System users will remain unchanged
System groups will remain unchanged except for some fields (
password, user_names, member_names, admin_names) which will be updated if needed.
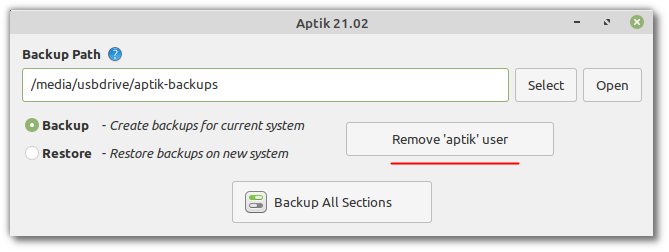
Notes
Logged-in users with incorrect UID/GID
It can sometimes happen, that restoring Users & Groups is done by a user with a UID/GID that is different from the previous system. Since it is not possible to change the UID/GID of users while they are logged-in, Aptik will prompt you to logout when you try to restore Users & Groups.
A special user named
aptikwill be created with the same credentials as the current user (so if current user istomthen useraptikwill get the same login password as the usertom)Logout from all user accounts and login as
aptikRestore the Users & Groups section using Aptik
Login back to your own user account. Remove user
aptikusing the button in main window.
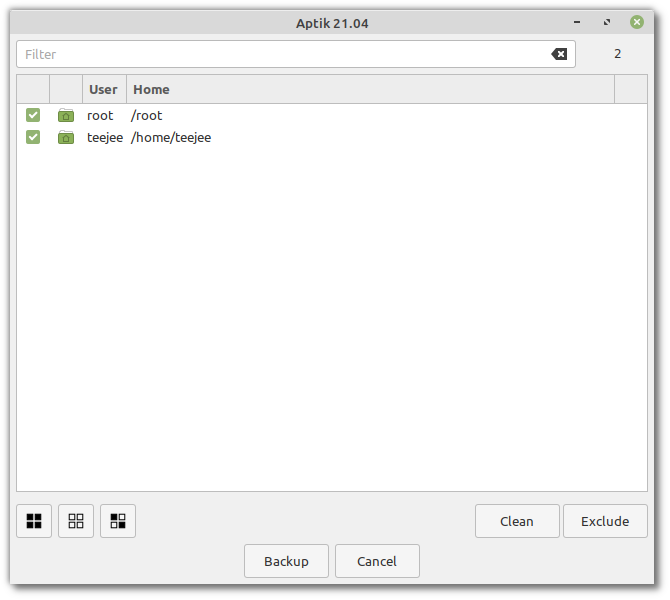
Home Directory Data
This section takes a backup of data in user’s home directory. Junk files and folders are excluded by default. Custom exclude entries can also be added. Data is compressed, encrypted and de-duplicated using BorgBackup.
Backup
Command-line syntax:
aptik --backup-home [--pass <password>] [--users <user1,user2...>]
Following actions are executed for backup:
For each user, the contents of home directory are archived using BorgBackup and saved to the backup location in
<basepath>/home/files/. This folder contains a single Borg repository with snapshots of home directory data for all users.
Restore
Command-line syntax:
aptik --restore-home [--pass <password>] [--users <user1,user2...>]
Following actions are executed for restore:
For each user, the latest snapshot of the home directory data is extracted to the user’s home directory. Files are restored to original locations with original permissions and timestamps.
Existing files will be overwritten without warning. New items found in home directory will be retained.
For each user, the ownership is updated for file and folders in user’s home directory. This ensures that all files in home directory are owned by the user.
Notes
Storage Options
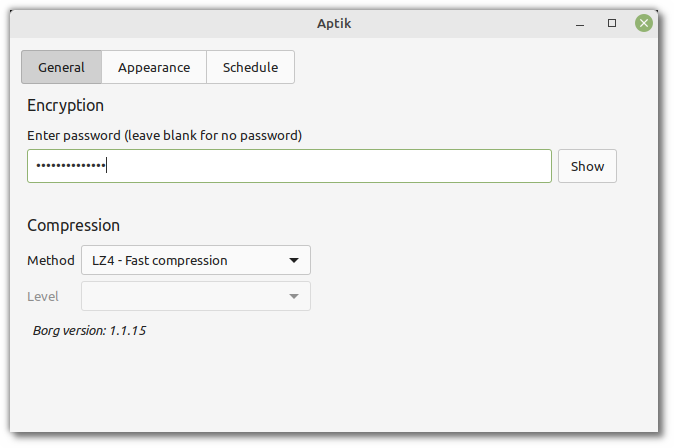
Files are de-duplicated, compressed, and encrypted with BorgBackup when they are saved to the backup location. The encryption password and compression settings can be changed from the Settings window.
Backups are incremental. If you run the backup again it will complete quickly since only new files need to be saved.
To remove existing backups, delete the backup folder
<basepath>/home/files/and take a new backup. You can also use the Clean button from the GUI to delete backups.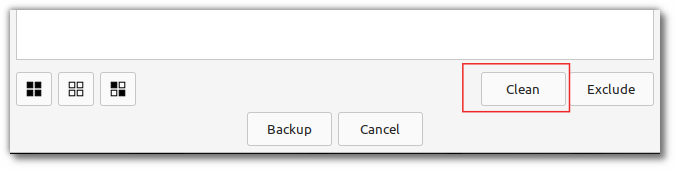
Password
Default password is empty. You can leave it empty if you don’t wish to password-protect the backups. There is no way to recover the backups if you forget the password so please choose a memorable password.
Password will be saved to
/etc/aptik.json. This file is owned by root and readable only by root user.
Exclusions
Some junk files and directories are excluded by default to save space and avoid issues after restore. These items are always excluded. There is no option to include them in backups.
~/.thumbnails
~/.cache
~/.dbus
~/.gvfs
~/.config/dconf/user
~/.local/share/Trash
~/.local/share/trash
~/.mozilla/firefox/*.default/Cache
~/.mozilla/firefox/*.default/OfflineCache
~/.opera/cache
~/.kde/share/apps/kio_http/cache
~/.kde/share/cache/http
~/.temp
~/.xsession-errors*
~/.Xauthority
~/.ICEauthority
~/.sudo_as_admin_successful
Exclude using GUI
To exclude items using the GUI, click the Exclude button.
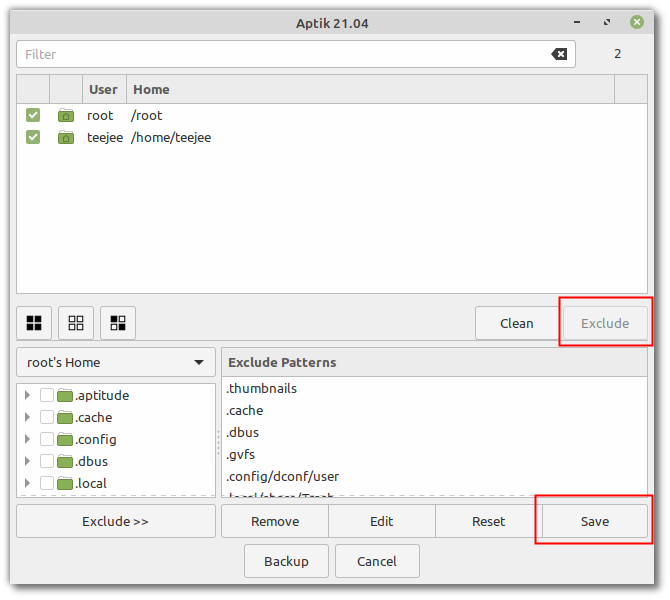
Select file and folders from the left-side panel and add them to the right-side panel.
Click the Save button to save the changes to the exclude list.
Click the Backup button to save the home directory data. You can also come back to the main window and click the Backup All Sections button.
The exclusion list is saved in the backup location and will be used again when you take a future backup. To reset the exclusion list, use the Reset button in the GUI, or select a new directory as the backup location.
Filesystem Traversal
Aptik will remain on the same file system when saving home directory data. It will not
traverse into other file systems that may be mounted in
sub-folders under the home directory.
Some people mount USB drives and NAS shares to subfolders in their home directory. The contents of these devices will not be saved.
Symlinks
Symbolic links are saved as symbolic links. The file or folder that it is pointing to will not be saved if it is located outside the home directory.
Command-line Usage
Backups can be created and restored for specific users with option
--users <user1,user2...>. Specify a comma-separated list of user names without space.You can specify the encryption password using
--pass <password>.Use the command
aptik --change-pass <password>to change the password for existing backups. You don’t need to specify the old password as it will be read from/etc/aptik.json.Entries found in file
<basepath>/home/exclude.listare automatically excluded. You can specify a text file with names of additional files and directories to exclude, using the option--exclude-from. For example,aptik --backup-home --exclude-from '/some/path/exclude.txt'. New entries in this list will be added to<basepath>/home/exclude.listand used for future runs.Sample file:
.steam
.java
Documents/some-stuff/
Path should be specified relative to a user’s home directory without including the username. Do not specify full paths, or paths specific to a particular user. Every pattern will be applied to every user’s home directory.
Hidden files and folders (with names starting with a dot) can be excluded with option
--exclude-hidden. These files and folders contain user-specific application settings. They can be excluded if you wish to only migrate your data, without migrating your application settings. It is not recommended to use this option, unless you have a good reason for doing so.To reset the exclude list, delete the file
<basepath>/home/exclude.listor select a new directory as the backup location.
Desktop Settings
This section takes a backup of users’ Dconf database settings. The Dconf database stores user-specific settings such as the desktop layout, application preferences, etc.
Dconf Database
The Dconf database stores application settings for each user. Aptik will backup and restore any changes that were made to the default settings. These changes are applied on top of the default Dconf configuration on the new system.
Backup
Command-line syntax:
aptik --backup-dconf
Following actions are executed for backup:
For each user, the dconf settings are examined
Any settings that have been modified by the user are saved to a backup file (
<basepath>/dconf/<username>.dconf-settings)
Restore
Command-line syntax:
aptik --restore-dconf
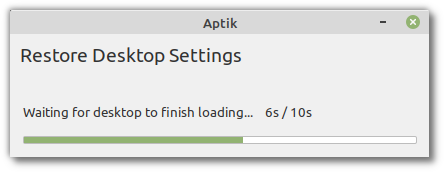
Dconf settings for a user can be restored only when the user is logged-in. The restore action will copy backup files to each user’s home directory and create an auto-start entry. The auto-start entry will restore the user’s settings on their next login.
Following actions are executed for restore:
Backup file
<basepath>/dconf/<username>.dconf-settingswill be copied to the user’s home directory (~/.config/aptik/dconf.settings)A script is created which will restore the settings from backup file (
~/.config/aptik/restore-dconf.sh)An auto-start entry is created which will restore the settings on the user’s next login (
~/.config/autostart/aptik_restore-dconf.desktop)When users login for the first time after doing a restore, the desktop settings will be restored after a delay of 10 seconds. This allows enough time for the desktop and desktop components (such as applets) to load completely, so that the settings can be applied properly. The script will delete the auto-start entry after settings are restored.
Scheduled Tasks
This section takes a backup of scheduled tasks. Cron jobs and scripts for each user are saved and restored.

Backup
Command-line syntax:
aptik --backup-cron
Following actions are executed for backup:
For each user, crontab entries are saved to a backup file
Script files in system directories are saved to the backup location
Script files that are part of the base Linux distribution will be excluded.
Note
systemd timers are not supported
Restore
Command-line syntax:
aptik --restore-cron
Following actions are executed for restore:
For each user, the crontab entries are updated
Script files found in backup location are installed to system directories
Icons
This section will backup and restore icon themes installed in system directories.
![]()
Backup
Command-line syntax:
aptik --backup-icons
Following actions are executed for backup:
Icon themes installed in system directories will be saved to the backup location
<basepath>/icons/files/.Each theme is saved as a TAR+GZIP archive
Restore
Command-line syntax:
aptik --restore-icons
Following actions are executed for restore:
Any theme that is not installed in system directories will be installed by extracting the archive.
Icon caches will be updated for the restored themes
Theme Packages
If you restore the section Software Packages - APT, the theme will be installed from repository, and there will be no need to install it again by extracting files to system directories. Themes which are already installed will be skipped during restore.
Locally-installed Themes
Locally-installed themes are not saved. They will be saved along with the home directory backup in section Home Data.
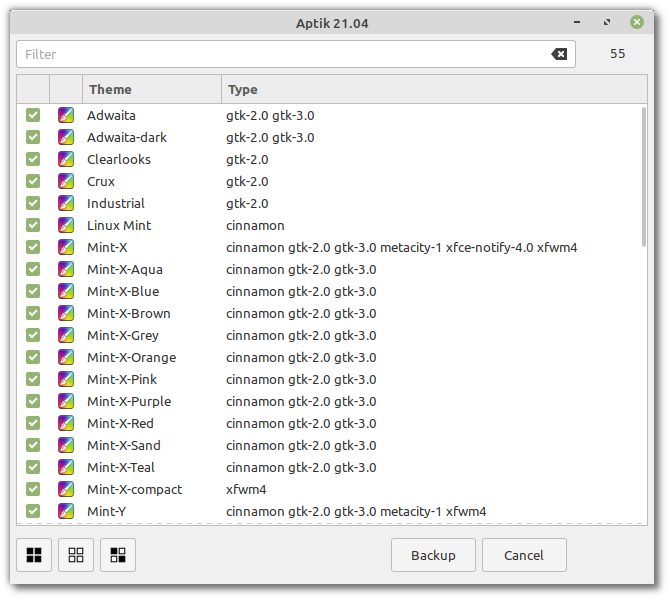
Themes
This section will backup and restore themes installed in system directories.
Backup
Command-line syntax:
aptik --backup-themes
Following actions are executed for backup:
Themes installed in system directories will be saved to the backup location
<basepath>/themes/files/.Each theme is saved as a TAR+GZIP archive
Restore
Command-line syntax:
aptik --restore-themes
Following actions are executed for restore:
Any theme that is not installed in system directories will be installed by extracting the archive.
Theme Packages
If you restore the section Software Packages - APT, the theme will be installed from repository, and there will be no need to install it again by extracting files to system directories. Themes which are already installed will be skipped during restore.
Locally-installed Themes
Locally-installed themes are not saved. They will be saved along with the home directory backup in section Home Data.
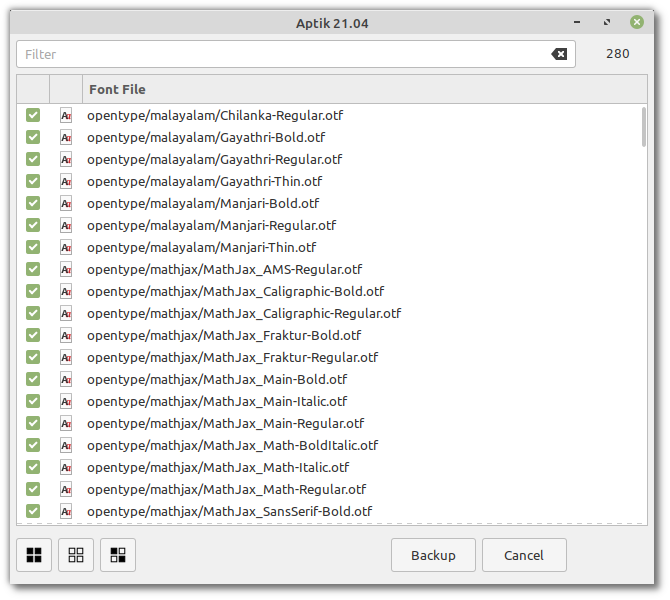
Fonts
This section will backup and restore fonts installed in system directories.
Backup
Command-line syntax:
aptik --backup-fonts
Following actions are executed for backup:
Themes installed in system directories will be saved to backup location
<basepath>/fonts/files/.Each font file is saved to backup location without compression.
Restore
Command-line syntax:
aptik --restore-fonts
Following actions are executed for restore:
Any font that is not installed on the system will be installed by extracting the font files to system directories.
Font caches will be updated on the system
Font Packages
If you restore the section Software Packages - APT, the font will be installed from repository, and there will be no need to install it again by extracting files to system directories. Fonts which are already installed will be skipped during restore.
Locally-installed fonts
Locally-installed fonts are not saved. They will be saved along with the home directory backup in section Home Data.
Miscellaneous (Advanced)
This option is for advanced users. It will save some system files and directories to the backup location and restore them on the target system. Permissions, timestamps and other file properties will be preserved.
Danger
There is no need to add anything to this section for a normal backup and restore. Adding unnecessary system files and folders to this section will result in a broken system.
Backup
Command-line syntax:
aptik --backup-files --add <path>
Following actions are executed for backup:
The file or directory specified by
<path>will be archived using Borg and saved to backup folder<basepath>/files/filesYou can add more files and directories by executing this command multiple times. There should be only one
--add <path>argument per invocation.This is useful for saving files and directories that are not directly supported by Aptik. For example, you can use the following command to backup virtual machines created by Virt-Manager:
aptik --backup-files --add "/var/lib/libvirt/images/"
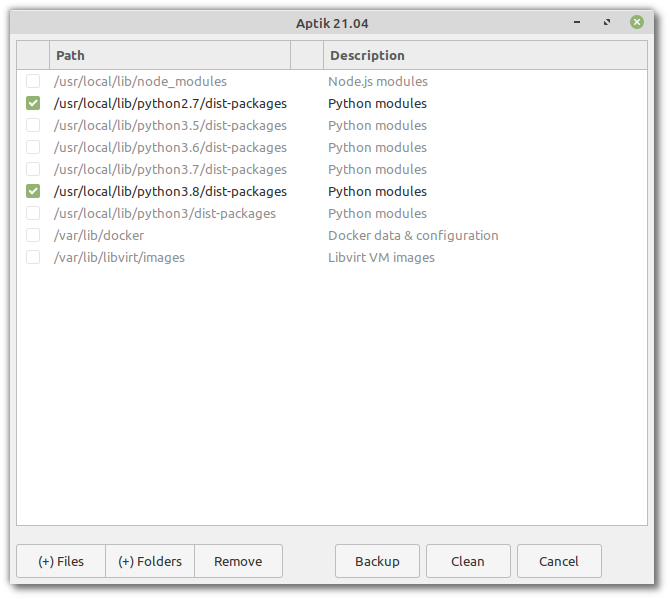
A set of pre-defined paths are added by default. These files will be saved if they exist on the system.
/var/lib/docker
/var/lib/libvirt/images
/usr/local/lib/node_modules
/usr/local/lib/python2.7/dist-packages
/usr/local/lib/python3/dist-packages
/usr/local/lib/python3.5/dist-packages
/usr/local/lib/python3.6/dist-packages
/usr/local/lib/python3.7/dist-packages
/usr/local/lib/python3.8/dist-packages
/var/lib/docker- Aptik can save and restore Docker images, containers and settings on systems that use the overlay2 storage driver. overlay2 is used by default on file systems like EXT4, etc. Docker has special storage drivers for BTRFS and ZFS which make use of snapshots. These storage drivers are not supported by Aptik due to their complexity. The Docker item will be enabled in the list only if the storage driver is supported. When restoring the Docker data there is no limitation on file system. Aptik will restore and use overlay2, even if the system was installed on BTRFS or ZFS./usr/local/lib/python*/dist-packages- Save and restore Python modules installed by thepip installcommand.
Restore
Command-line syntax:
aptik --restore-files
Following actions are executed for restore:
All files in backup folder
<basepath>/files/fileswill be extracted to the root of the filesystem (/). Existing files will be overwritten without warning./var/lib/docker- Docker service will be stopped before backup and restore. Service will be started again after the action is complete.
Scripts (Advanced)
Backup
Post-install scripts can be placed in <basepath>/scripts/files
for any actions that need to be executed after restore is complete.
These scripts are executed by the commands --restore-all and
--restore-scripts.
Restore
Scripts will be sorted alphanumerically on file name and executed one by one. Scripts should be numbered or named in the order in which they need to be executed.
Tip
Scripts that have a file name ending with tilde character ~ will be ignored.
This can be used to enable and disable individual scripts by renaming them.